$URL: svn+ssh://mrwhat@ssh.boim.com/home/mrwhat/svn/Walker/trunk/Building3D.html $
$Id: Building3D.html 316 2013-11-07 20:17:50Z mrwhat $
Building standoff-hinged Walking Linkage, 3D printed
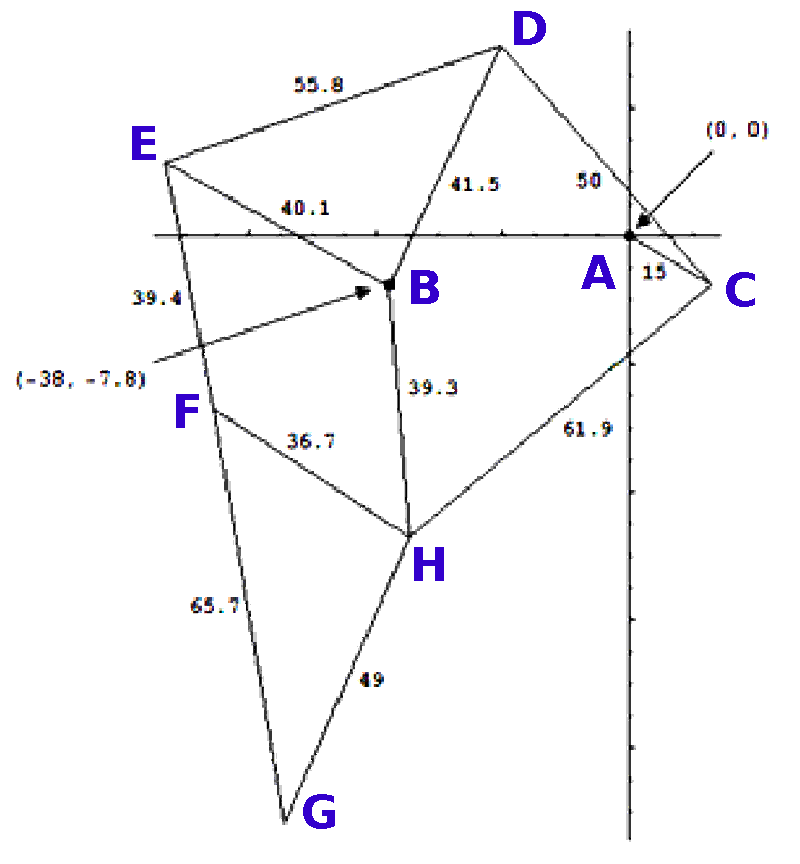 This drawing will help explain my conventions for naming parts
of the linkage:
This drawing will help explain my conventions for naming parts
of the linkage:
For a complete chassis hardware setup, using 3/16" OD standoff hinges you will want :
- (2) gearhead motors
- motor driver module
- (2) 3/16" OD brass tubes or steel rods, 1 foot long
- CA cement, gap filling, medium-viscosity
- (16) 1/2" long, 3/16" OD standoffs for #4-40 screws
- (24) 3/16" long, 3/16" OD standoffs for #4-40 screws
- (2) #4-40 0.25 to 0.75 inch threaded rods.
Can be made by cutting the head off of a screw, and then cleaning the threads.
- (76) 5/16" long #4-40 pan or round-head screws
- (74+) #4 flat washers
- (4) #4 larger diameter flat washers, if available. (standard diameter is OK)
If washers are thin, may need to double some for clearance on 5/16" #4-40 screws, or replace some 5/16" screws with 1/4"
- (74) #4 internal tooth lockwashers
The 3/16" OD standoffs are fairly rare.
I can sell some for slightly above cost.
I intend to offer full hardware packages, including these standoffs, soon.
Drills
After 3D printing the linkage, holes may need to be precision drilled.
| Bit | Notes |
|---|
| #10 |
free on 3/16" OD axle and standoffs |
|---|
| #11 |
free on 3/16" OD axle and standoffs, if "polished" after drill |
|---|
| #12 |
Snug (but not press-fit) on 3/16" OD, good for non-moving connections to B-axle |
|---|
| #35 |
snug, but free around #4-40 screw |
|---|
Chassis assembly
Chassis assembly is organized in four steps:
- Parts preparation
- Leg sub-assemblies
- Payload assembly
- Main chassis integration
This completes the base of a fairly typical robot chassis, with dual motor control.
I will be publishing my design for running this chassis over a Bluetooth remote
control soon.
It uses an open-source Android app to send control commands to a Bluetooth receiver,
attached to an Arduino nano compatible microcontroller module.
The motors are controlled from a fairly common LM298 based motor control module.
 Last modified: 131007